插件中文资料库
中文说明、玩家点评、适用场景和替代推荐,方便快速判断是否适合你。
- 界面布局、头像框、姓名板和动作条优化
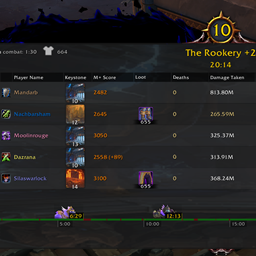 Details! Mythic+ Scoreboard
 Myslot
 DBM - Dungeons, Delves, Visions, & Events (Requires Deadly Boss Mods) - DBM
CursorTrail 插件下载与使用指南
本页整理了 CursorTrail 的功能用途、适用人群、安装方法和常见问题,方便玩家快速判断是否需要安装。
适合谁用
CursorTrail 是一款 战斗 / 界面美化 / 其他插件 类插件,适合需要优化界面、提升操作效率或补充游戏信息提示的魔兽世界玩家。
基本信息
- 插件作者:UppyDan
- 插件分类:战斗 / 界面美化 / 其他插件
- 适配版本:1.15.8,2.5.5,5.5.4,12.0.7
- 累计下载:1,863
安装方法
- 点击上方下载按钮获取 CursorTrail插件文件。
- 解压后将插件文件夹放入 World of Warcraft/_retail_/Interface/AddOns 目录。
- 重启游戏或在角色界面点击插件,确认 CursorTrail 已启用。
- 如果插件不生效,请检查版本是否匹配,或关闭同类冲突插件后重试。
使用建议
CursorTrail 安装后建议先在角色界面确认已启用,进入游戏后根据插件提供的命令、小地图按钮或设置面板进行调整。如遇到报错,可先单独启用该插件排查冲突。
CursorTrail 常见问题
CursorTrail 适合需要 战斗 / 界面美化 / 其他插件 类功能的玩家,特别是希望提升游戏便利性、界面管理或战斗信息获取效率的用户。
下载后解压到 Interface/AddOns 目录,然后重启游戏并在角色界面启用插件。
常见原因是目录多套一层、游戏版本不匹配、依赖插件缺失或同类插件冲突。
可以查看本页的替代插件推荐和相关插件区域,按下载量和分类选择同类工具。
插件 AI 问答
可以问:这个插件正式服能用吗、和 DBM 冲突吗、怎么设置、有没有替代插件。
CursorTrail 是一款魔兽世界插件,主要用于其他插件相关功能。建议根据自己的版本和插件环境先测试兼容性。
插件用途
CursorTrail 主要面向需要其他插件功能的玩家,用来改善游戏体验、减少重复操作或补充默认界面没有直接提供的信息。
适用场景
- 其他插件相关功能
使用建议
安装后建议先在角色选择界面或插件管理器中确认已启用,再进入游戏测试是否与现有整合包、WA 和其他插件冲突。如遇报错,可以先禁用同类插件排查。
~~~~~~~~~~~~~~~~~~~~~~~~~~~~~~~~~~~~~~~~~~~~~~~~~~~~~~~~~~~~~~~~~~~~~~~~~~~~
Description
Have you ever had a hard time finding your cursor when a battle gets crazy? CursorTrail uses built-in, animated models to produce glowing/trail effects around the cursor when the mouse is moved.
(Works in Retail WoW, Classic Mists of Pandaria, Classic Burning Crusade, and Classic WoW.)
~~~~~~~~~~~~~~~~~~~~~~~~~~~~~~~~~~~~~~~~~~~~~~~~~~~~~~~~~~~~~~~~~~~~~~~~~~~~~
Options
The main options window can be opened from the standard addons window, or by typing "/ct" or "/cursortrail". Settings are saved separately for each of your WoW characters, so your tank (for example) can have different cursor effects than your other characters.
* Master Scale %: Controls the size of all models, shapes, and sizes on all layers. Leave this at 100% when designing a new set of FX, then use it later to make everything bigger or smaller as desired.
Note: Master scale is combined with each layer's scale value to calculate the final size of each FX.
* Layers: Selecting a layer tab shows the options for that layer. Tabs for enabled layers will be slightly green instead of their standard color, indicating which layers are enabled without needing to select them.
If layers have the same "Layer Strata" setting, layer 1 FX are drawn on top of layer 2 FX.
* Enable Layer: When on, the current layer's FX will be drawn on screen.
* Shape: A list of shape effects to choose from.
The shape's color can be changed by clicking the color swatch button to the right of the Shape selection.
When "Sparkle" is turn on, the chosen shape color is ignored and the shape "sparkles" instead. (Sparkle does not affect model color.)
* Model: A list of animated cursor effects to choose from. Models can be repositioned using "Model Offsets" described below.
* Shadow %: Controls how intense the black background circle is. 99% is darkest, while 0% is invisible (off).
* Scale %: Controls the size of the effect. Can be 2 to 998.
* Opacity %: Controls how transparent Shape and Model are. 100% is fully visible, while 0% is invisible (off).
* Layer Strata: Controls whether shapes and models are drawn behind or in front of other UI objects. It does not effect the Shadow option. ("Background" is the bottom-most drawing layer, and "Tooltip" is the top-most.)
* Model Offsets: Moves the center of the Model effect. The first number box moves it horizontally (negative numbers move left, positive move right). The second number box moves it vertically (negative numbers move down, positive move up).
* Fade out when idle: When on, the cursor effects fade out when the mouse stops moving.
* Show only in combat: When on, the cursor effects will only appear during combat.
* Show during Mouse Look: When on, the cursor effects will remain visible while using the mouse to look around.
* Defaults: Each default has different preset options. You can use them as a starting point for your own effects. To save a default, select "Save as" from the profiles menu.
~~~~~~~~~~~~~~~~~~~~~~~~~~~~~~~~~~~~~~~~~~~~~~~~~~~~~~~~~~~~~~~~~~~~~~~~~~~~~
Tips
Layers:
- Right-clicking an empty area of the UI opens a context menu at the mouse for performing various actions to the layer.
- When clicking on layer tab names ...
Left-click = Selects that layer. (Normal behavior.)
Shift + Left-click = Toggles that layer's enabled state without selecting it.
Right-click = Opens the context menu.
Shift + Right-click = Selects that layer and toggles its enabled state.
- Pressing Ctrl+Tab or Shift+Ctrl+Tab selects the next/previous layer.
- Using the mouse wheel while hovering over a layer's tab name will cycle through all layers.
Profiles:
- Right-clicking the profile name is a quick way to save it.
- Shift-clicking a name in the profile list keeps the list open after loading the profile.
Changing Values:
- Right-clicking most options sets them to their default value. Right-clicking them again changes back to their previous value.
- The mouse wheel can be used to change the option under the mouse.
- The Up/Down arrow keys can be used to change the option that has focus.
~~~~~~~~~~~~~~~~~~~~~~~~~~~~~~~~~~~~~~~~~~~~~~~~~~~~~~~~~~~~~~~~~~~~~~~~~~~~~
Profiles
Profiles (your settings) can be saved and loaded between all your characters from the options window:
- To create a new profile, select "New Profile" from Menu.
- An asterisk (*) at the end of the active profile name indicates the displayed values have been modified, but those changes have not be saved to the profile yet.
- Unsaved profile changes can be undone by selecting the same profile name from the Load dropdown list.
- To save changes to the active profile, right-click the profile name, or select "Save As" from Menu.
- Clicking the Okay button keeps any changes to displayed values, but does not save those changes to the active profile. This allows trying different addon settings while still being able to undo those changes later.
To change this behavior, select "Profile Options" from Menu, and turn on "Save profile when Okay button is clicked".
- When selecting a default profile, its name will not appear in the Load dropdown list unless it is saved first.
- While hovering over the profile name, the mouse wheel can be used to load the next/previous profile.
- While the Load dropdown list is open ...
Holding Shift while clicking a name keeps the list open.
Holding Shift while using the mouse wheel loads the next/previous profile.
- The small arrows next to the [X] button cycle through profiles in the Load and Defaults dropdown lists.
Profiles can also be managed using slash commands:
/ct save <profile name>
/ct load <profile name>
/ct delete <profile name>
/ct list
~~~~~~~~~~~~~~~~~~~~~~~~~~~~~~~~~~~~~~~~~~~~~~~~~~~~~~~~~~~~~~~~~~~~~~~~~~~~~
Backups
Backups of your profiles can be created and restored from the options window:
- You can backup or restore all your profiles from the options window by selecting "Backup" or "Restore" from Menu.
- Two backups will always be available to restore from:
@Original - Contains profiles that existed the very first time the profiles UI was used.
@Login - Contains profiles that existed the last time you logged into the game.
- Old backups can be deleted by selecting "Restore" from Menu, and then clicking the red "X" icon along the right side of the name you want to delete.
Backups can also be managed using slash commands:
/ct backup <backup name>
/ct restore <backup name>
/ct deletebackup <backup name>
/ct listbackups
~~~~~~~~~~~~~~~~~~~~~~~~~~~~~~~~~~~~~~~~~~~~~~~~~~~~~~~~~~~~~~~~~~~~~~~~~~~~~
Slash Commands
Type "/ct help" to see a list of all slash commands.
~~~~~~~~~~~~~~~~~~~~~~~~~~~~~~~~~~~~~~~~~~~~~~~~~~~~~~~~~~~~~~~~~~~~~~~~~~~~~
Troubleshooting
- Some models disappear if scaling is set too low. If you select a model and it doesn't show up, try a larger Scale %. (All models work at 100% scale.)
- If the cursor effects unexpectedly disappear, you can quickly get them back by typing "/ct reload".
- If shapes and shadows do not follow the mouse cursor properly, and you are using an addon to change the game's UI scale below the normal minimum (64%), type "/ct reload" (or do a normal game reload) so CursorTrail uses the new scale value.
- If you use the CTMod addon, it has the same slash command (/ct) and only one addon will open.
If CTMod always opens when you type /ct, use /cursortrail to open CursorTrail.
If CursorTrail always opens when you type /ct, you can manually change CursorTrail's slash command to something else, such as "/ctr".
IMPORTANT - You will need to repeatedly make this change after every download of CursorTrail.
1. Using any text editor, open "CursorTrail.lua" located in CursorTrail folder within your Warcraft addons folder.
(e.g. "C:\Program Files\World of Warcraft\_retail_\Interface\AddOns\CursorTrail\CursorTrail.lua")
2. Search in that file for "SLASH_".
3. The line after that needs to be modified. Change the end of the line from,
Globals["SLASH_"..kAddonFolderName.."2"] = "/ct"
to your new slash command,
Globals["SLASH_"..kAddonFolderName.."2"] = "/ctr"
4. Save your changes, then reload World of Warcraft (/reload).
~~~~~~~~~~~~~~~~~~~~~~~~~~~~~~~~~~~~~~~~~~~~~~~~~~~~~~~~~~~~~~~~~~~~~~~~~~~~~
CurseForge: https://www.curseforge.com/wow/addons/cursortrail用户评价
暂无 / 5,0 条评价相关推荐
继续看看这些内容